Once ScaleXP Invoicing is installed and your products are mapped, you can create invoices from any HubSpot deal and send them to Xero or QuickBooks Online. Complete Step 3: Map HubSpot products to Xero or QuickBooks before you start.
1. Open the invoice editor
- In HubSpot, open the deal you want to invoice. It needs an associated company or contact, and line items (from a quote or added to the deal).
- In the right sidebar, find the ScaleXP Invoicing card and click View or Edit Invoices. The invoice editor opens.
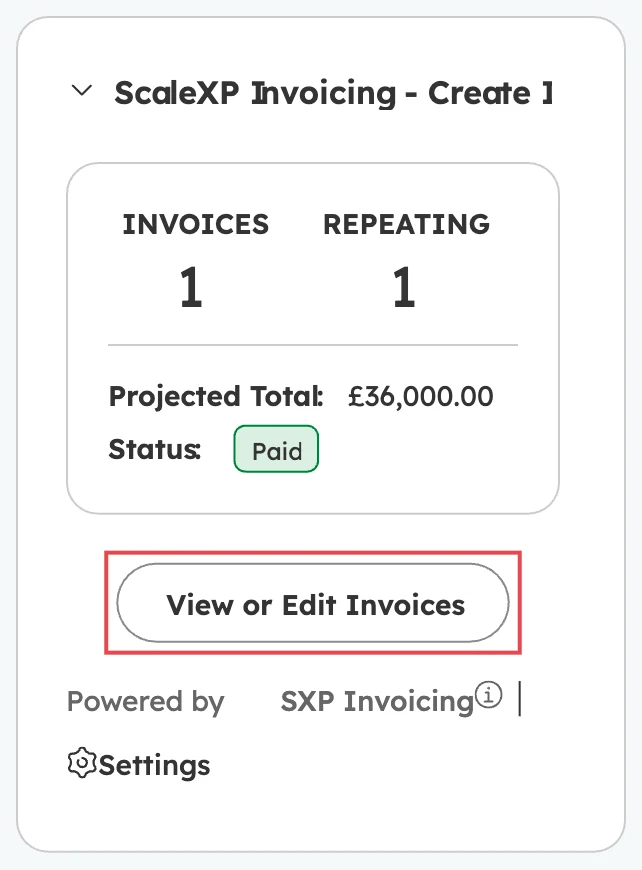
If you can’t see the card, scroll down the sidebar or see ScaleXP Invoicing: Managing app cards in HubSpot.
2. Check the invoices are filled in
ScaleXP Invoicing fills in the invoices from the deal’s line items, matching each SKU to a product in your accounting system. One-off line items go on a standard invoice and recurring line items go on a repeating invoice. If you change the line items in HubSpot later, click AutoFill to rebuild the invoices.
To add an invoice yourself, scroll to the bottom of the editor, choose Standard Invoice or Repeating Invoice, set how many and click Add more invoices. To link an invoice that already exists in your accounting system, click Import Existing Invoices. See ScaleXP Invoicing: Importing invoices to HubSpot deals.

3. Check the contact and invoice settings
At the top of the editor, check:
- Contact: the customer in your accounting system, matched from the deal’s company or contact. Click Edit Contact to review the details. If there’s no match, search for the customer or create a new one, which is added to Xero or QuickBooks when you save.
- Currency: the invoice currency.
- Account and Tax: apply one account and tax rate to every line, if you don’t want them set line by line.
- Tracking: Xero tracking categories (such as Region and Department) or QuickBooks classes and locations.
- Themes: the invoice template (Xero branding theme).
4. Review each invoice
Check the details on each invoice:
- Start Date and End Date: the invoice date and, for repeating invoices, when the schedule ends.
- Schedule (repeating invoices): how often the invoice repeats, for example every 12 months.
- Due: for example 30 days after the bill date.
- Create as: Draft, so finance can review it in your accounting system, or approved and ready to send.
- Reference and Internal Notes.
- Line items: the product (Item), description, tracking, account, tax, quantity, price and discount. Pricing and descriptions come from HubSpot. Click Add Line Item to add one, or Use Default Accounts and Taxes to reset them.
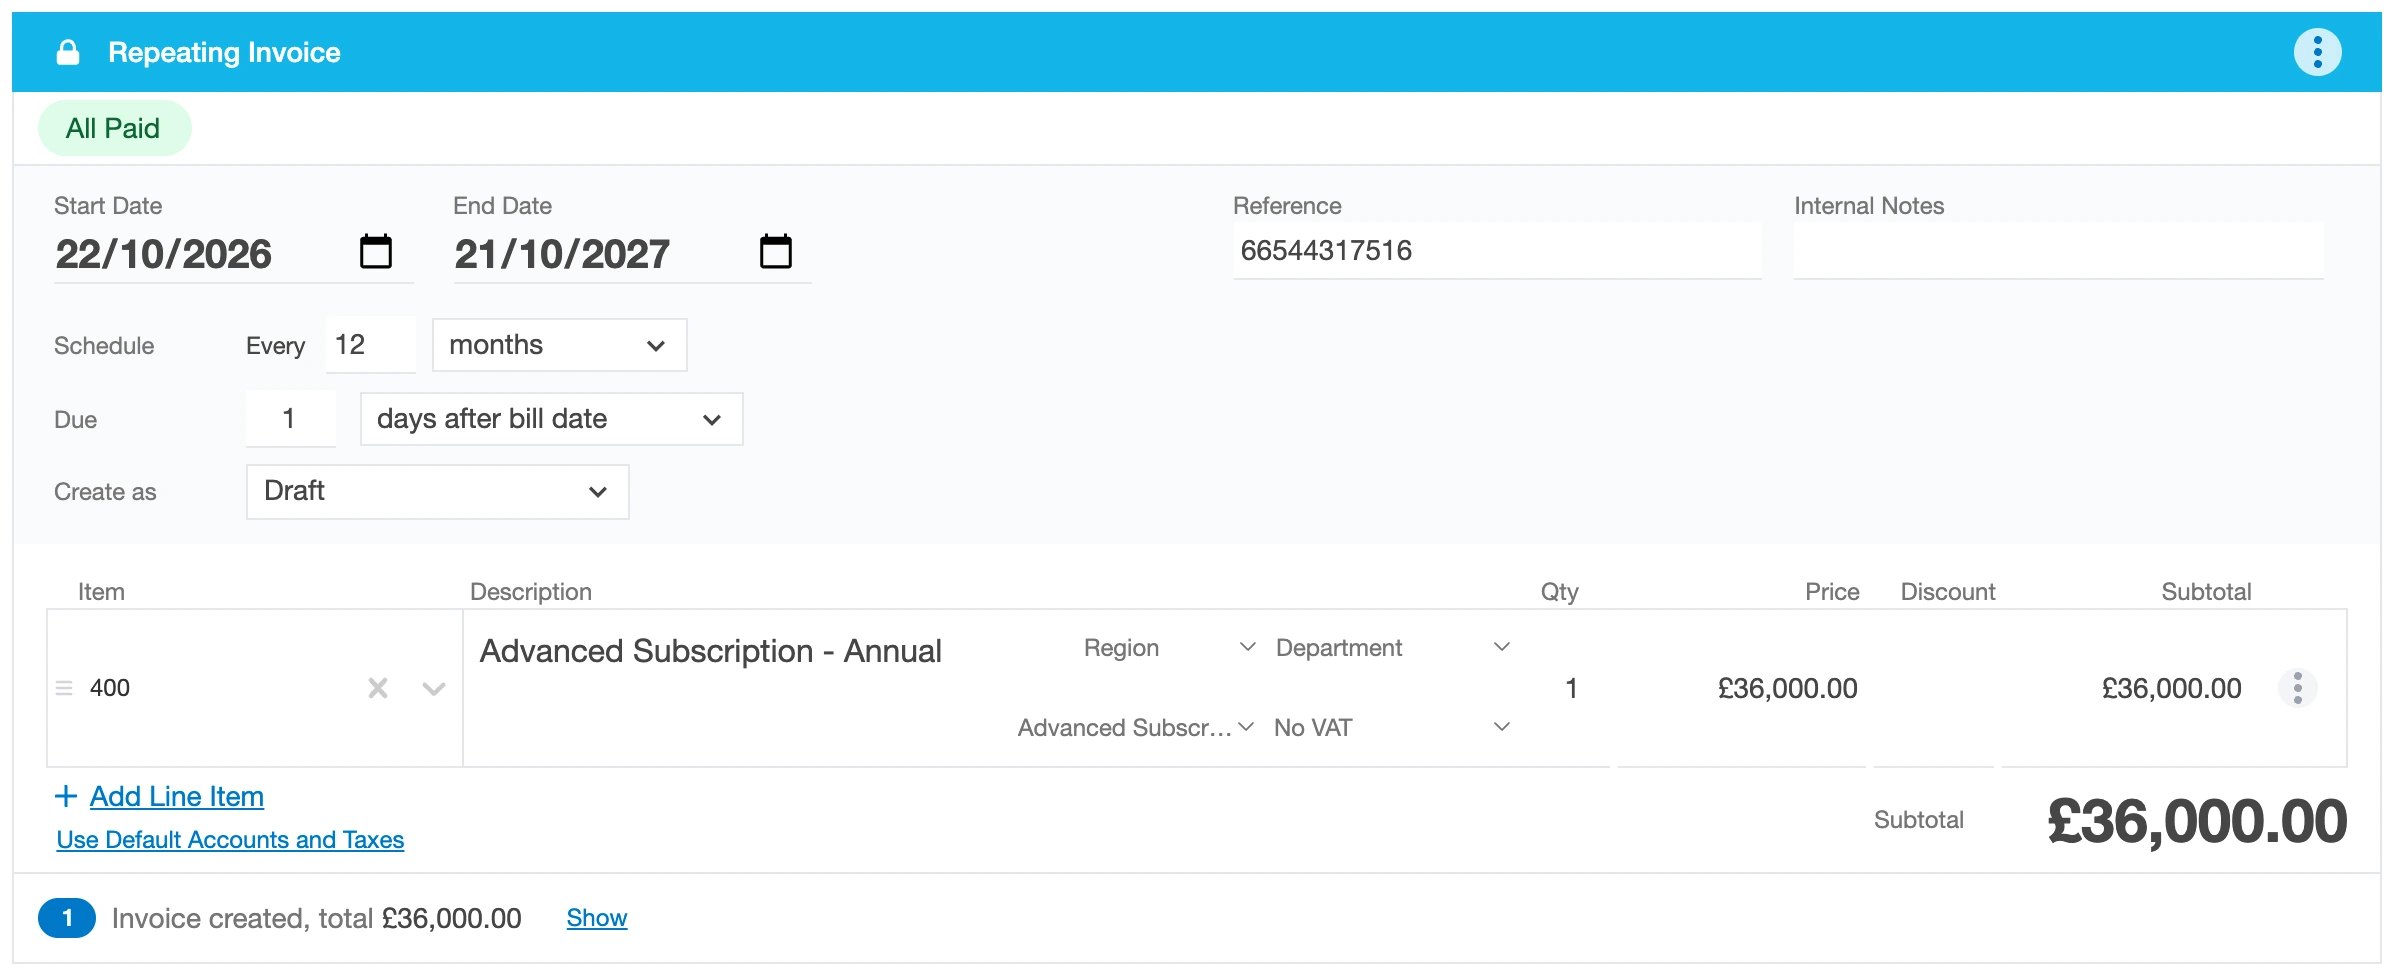
Click Save Progress to save your changes and come back later.
QuickBooks Online: if your products are taxable, QuickBooks calculates sales tax automatically. You can override it with the Tax option.
5. Sync to your accounting system
- Click Sync to Xero or Sync to QuickBooks at the top right. ScaleXP Invoicing creates the invoices in your accounting system.
- The invoice number is assigned by Xero or QuickBooks. Repeating invoices are created as Xero repeating invoices or QuickBooks recurring invoices.

6. Check the deal
Close the editor. The ScaleXP Invoicing card now shows the number of invoices and repeating invoices, the projected total and the status. Any change in your accounting system, such as an invoice being paid, updates the deal. See ScaleXP Invoicing: Data fields synced back to HubSpot.
To email the invoice to your customer from HubSpot, see ScaleXP Invoicing: How to send invoices in HubSpot.
Related articles
- Start here: Automate invoicing from HubSpot
- Step 3: Map HubSpot products to Xero or QuickBooks
- ScaleXP Invoicing: Data fields synced back to HubSpot
- ScaleXP Invoicing: How to send invoices in HubSpot
- ScaleXP Invoicing: How to create split invoices in HubSpot
- ScaleXP Invoicing: How to create recurring invoices in HubSpot