Rather than building your P&L groups one by one, you can upload a report you already use — last month's board pack, a management report, or an Excel or CSV export from your old system or accountant — and ScaleXP copies its layout, places your accounts into matching groups and subgroups, checks the result, and applies it in one go, with an undo if you change your mind.
Importing is available for the Profit & Loss statement to users with edit access. You can still set up or adjust groups by hand at any time, as described in How to configure your P&L and balance sheet in ScaleXP (single company).
1. Prepare your report
Save the report as an .xlsx or .csv file. The import works with two kinds of report:
- A report that lists the accounts under each group — each group line is followed by, or repeats against, the accounts that make it up
- A summary report with group lines only — for example a board pack showing totals such as "Salaries" or "Marketing" without the accounts behind them
If your report lists its accounts, make sure the account names or codes match those in your accounting system (Xero, QuickBooks or Zoho Books), so each one can be matched exactly. Bold "Total…" rows are recognized as totals and are never turned into groups, and hidden sheets are skipped.
For a summary report, use a month that is already closed in your accounting system, so ScaleXP can check the figures against your actuals.
2. Open the import
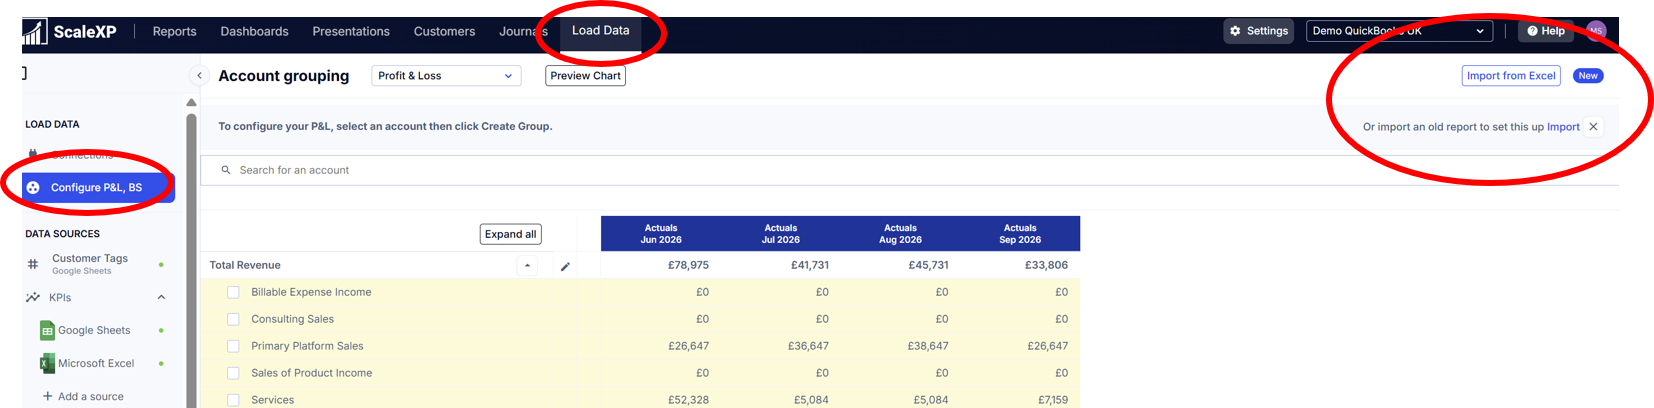
- Go to Load Data › Configure P&L, BS.
- Make sure Profit & Loss is selected.
- Click Import from Excel at the top right of the Account grouping page, or click Import in the info bar under the header.
3. Select the file to import
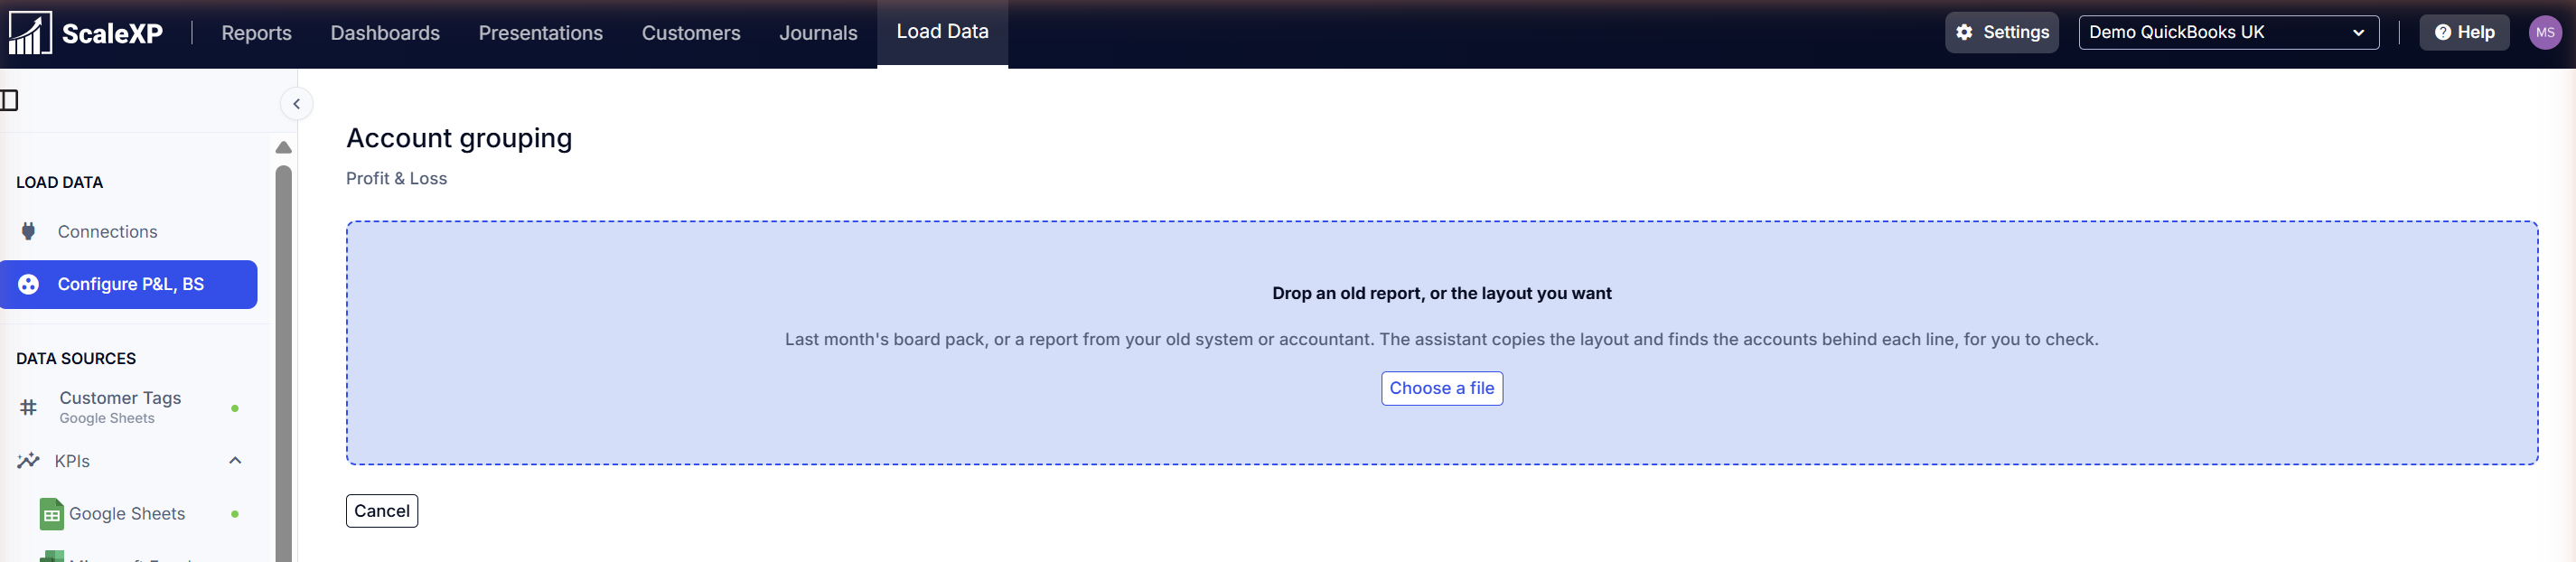
Drag your file onto the drop zone, or click Choose a file and select it.
ScaleXP reads the file, reviewing the layout and figures, and suggests a new layout. This usually takes a minute or two, and you can leave the page and come back; the import reopens where you left it.
If the file can't be read, you'll see We couldn't read this report. Check it's the P&L you report from, saved as .xlsx or .csv, then click Upload again.
4. Review any flagged accounts
If ScaleXP matched every account with confidence, you go straight to step 5.
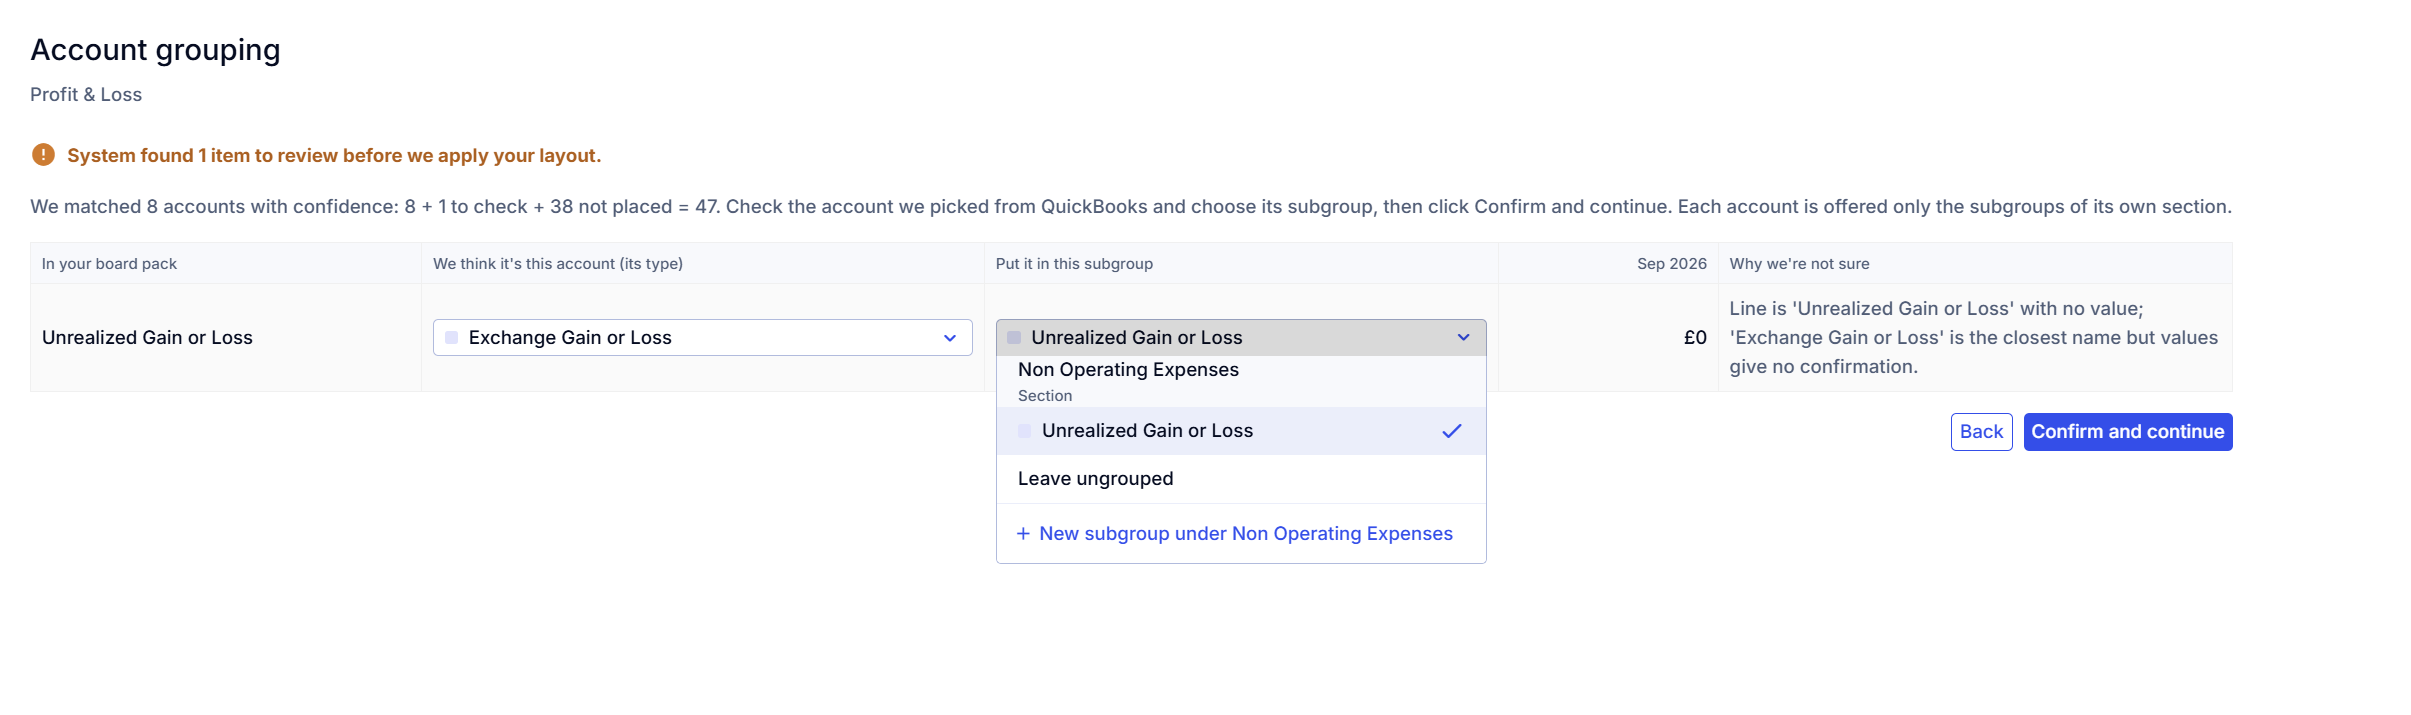
Otherwise, you'll see a list of items to review, such as an account it wasn't sure about, an account it couldn't find, an account whose type doesn't match the report's section, or a report line with no accounts behind it. Use the dropdown menus to adjust the layout and groupings as required.
When every row is confirmed or changed, click Confirm and continue.
5. Check and apply the layout
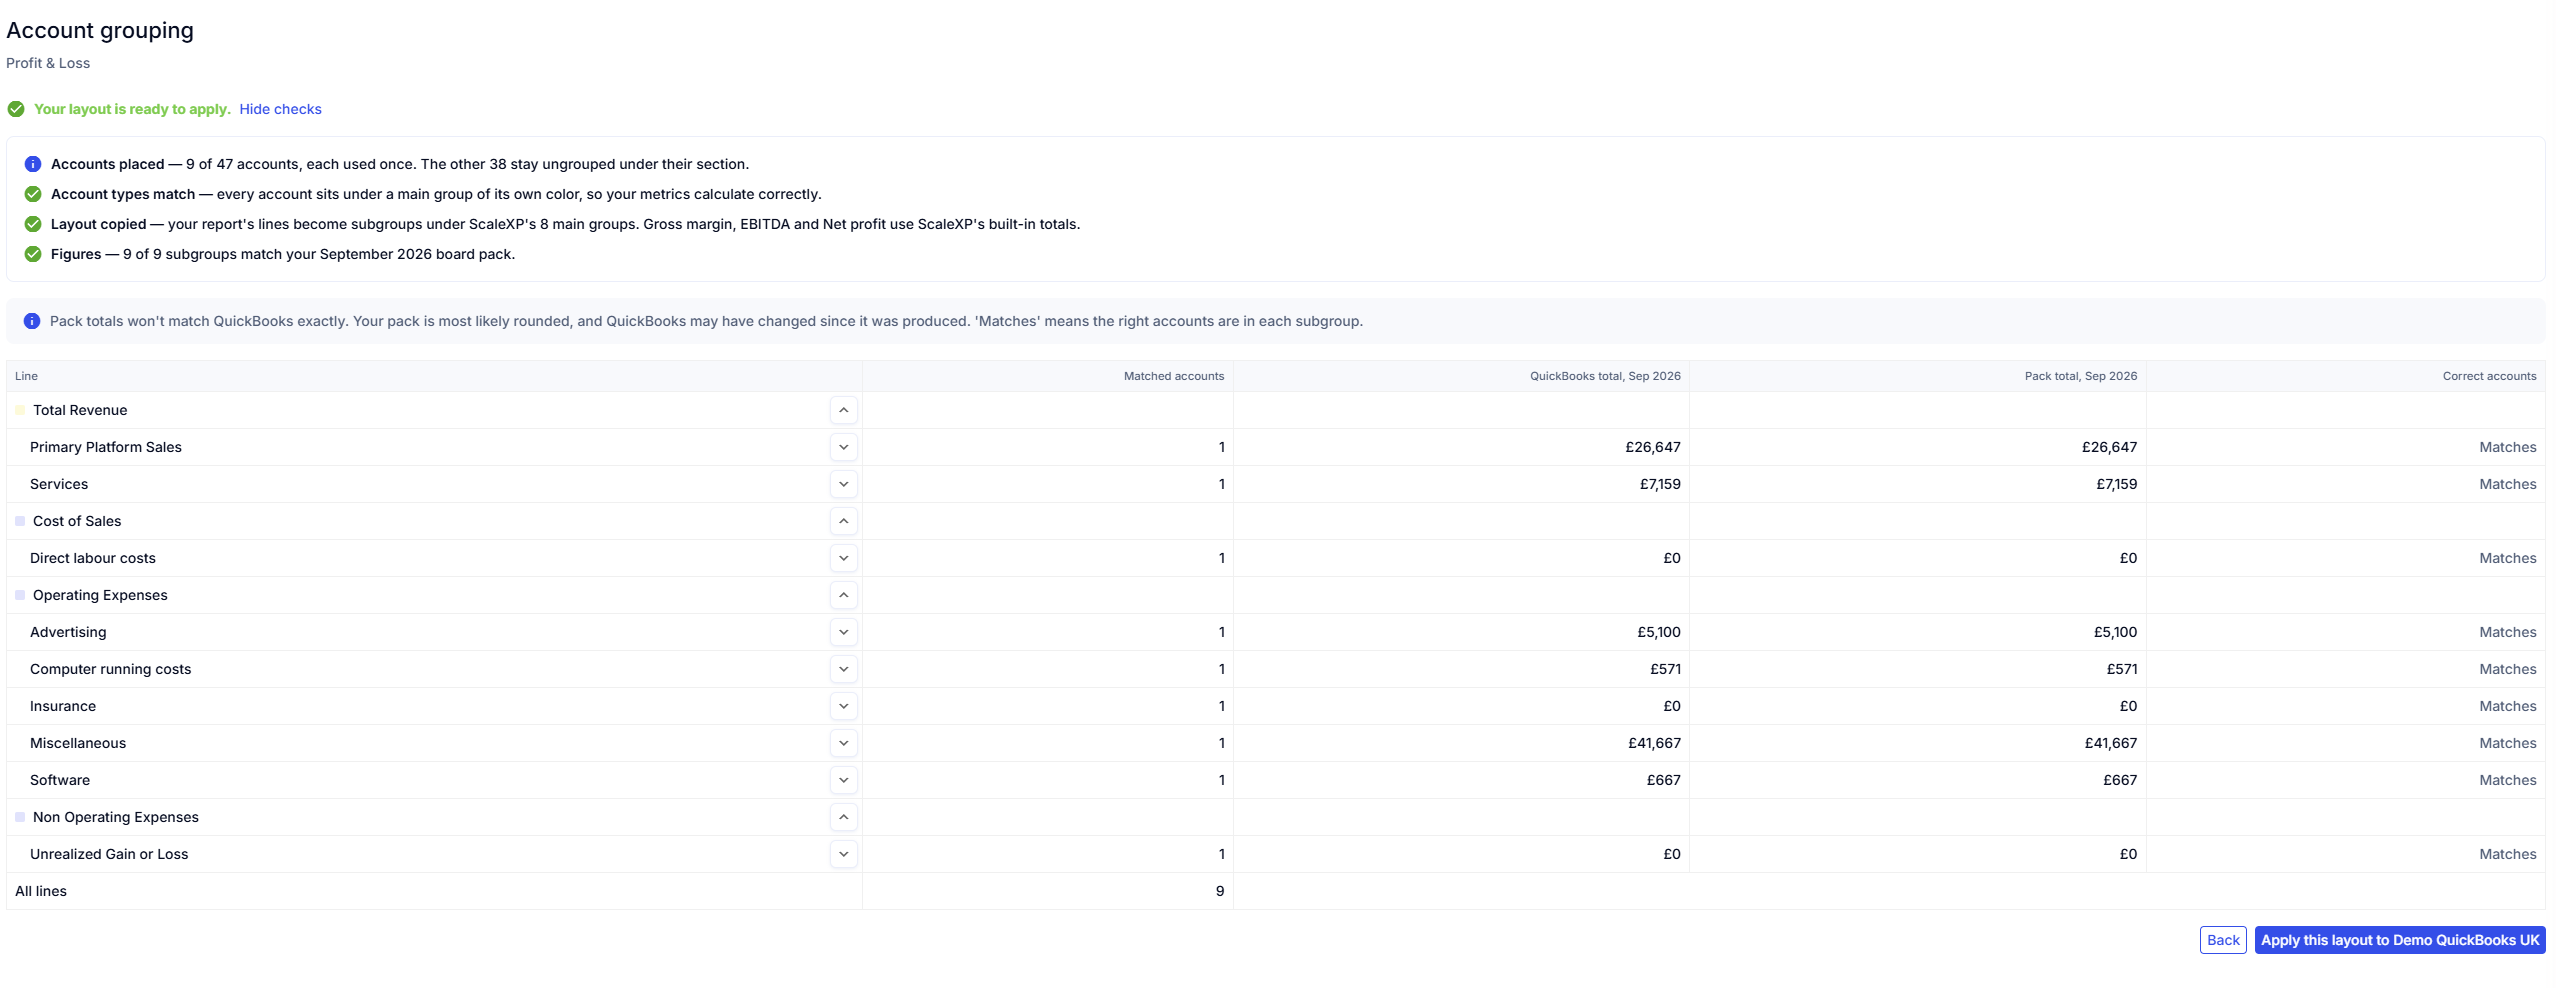
The Check and apply page summarizes the result:
- All accounts placed — every account is used once
- Account types match — every account sits under a main group of its own color
- Layout copied — your report's lines become subgroups under ScaleXP's 8 main groups
- Figures — how many subgroups match your report's totals for the month
Gross margin, EBITDA and net profit are calculated using ScaleXP's built-in totals. Report totals rarely match your accounting system exactly, because reports are often rounded and the books may have changed since; Matches means the right accounts are in each subgroup. Figures aren't checked for a report that lists its accounts, because the accounts are named in the file.
- Click any line in the table to expand it and see its accounts and values.
- Click Apply this layout to [organization name].
- Review the summary of how many existing groups are replaced, kept (groups with the same name) and removed, then confirm.
The Account grouping page reloads with your new groups and a green Imported from [file name] banner.
6. Fine-tune or undo the import
Your imported groups work exactly like groups you create by hand. Tick accounts and use Move to, Create Sub Group, edit or delete to make any changes — see How to move accounts and How to add a subgroup to reports.
To go back to your previous groups:
- Click Undo import in the Imported from [file name] banner.
- Confirm Undo this import?.
Your P&L groups are put back as they were before the import, and any changes made since the import are discarded. Undo import is available for seven days after applying, or until you close the banner.

Related articles
- How to configure your P&L and balance sheet in ScaleXP (single company)
- How to configure your P&L and balance sheet in ScaleXP (consolidated company)
- How to view all uploaded accounts and their groupings
- How to move accounts
- How to find uncategorized accounts
- How to add a subgroup to reports
- How to move and group financials across entities using cascade from parent