ScaleXP Invoicing matches each HubSpot line item to a product in Xero or QuickBooks Online using its SKU. When the SKUs match, the right product, sales account and tax rate are filled in for you. Complete Step 2: Configure ScaleXP Invoicing before you start.
1. How SKU matching works
- The SKU on a HubSpot product must match the Code on a Xero item or the SKU on a QuickBooks Online product.
- When they match, ScaleXP Invoicing picks that product and fills in its sales (income) account and tax rate.
- Price and description always come from the HubSpot line item. The price and description in your accounting system are only used when you add a product by hand in the invoice editor.
- If there's no match, or you want a different product, pick one from the Item column in the invoice editor.
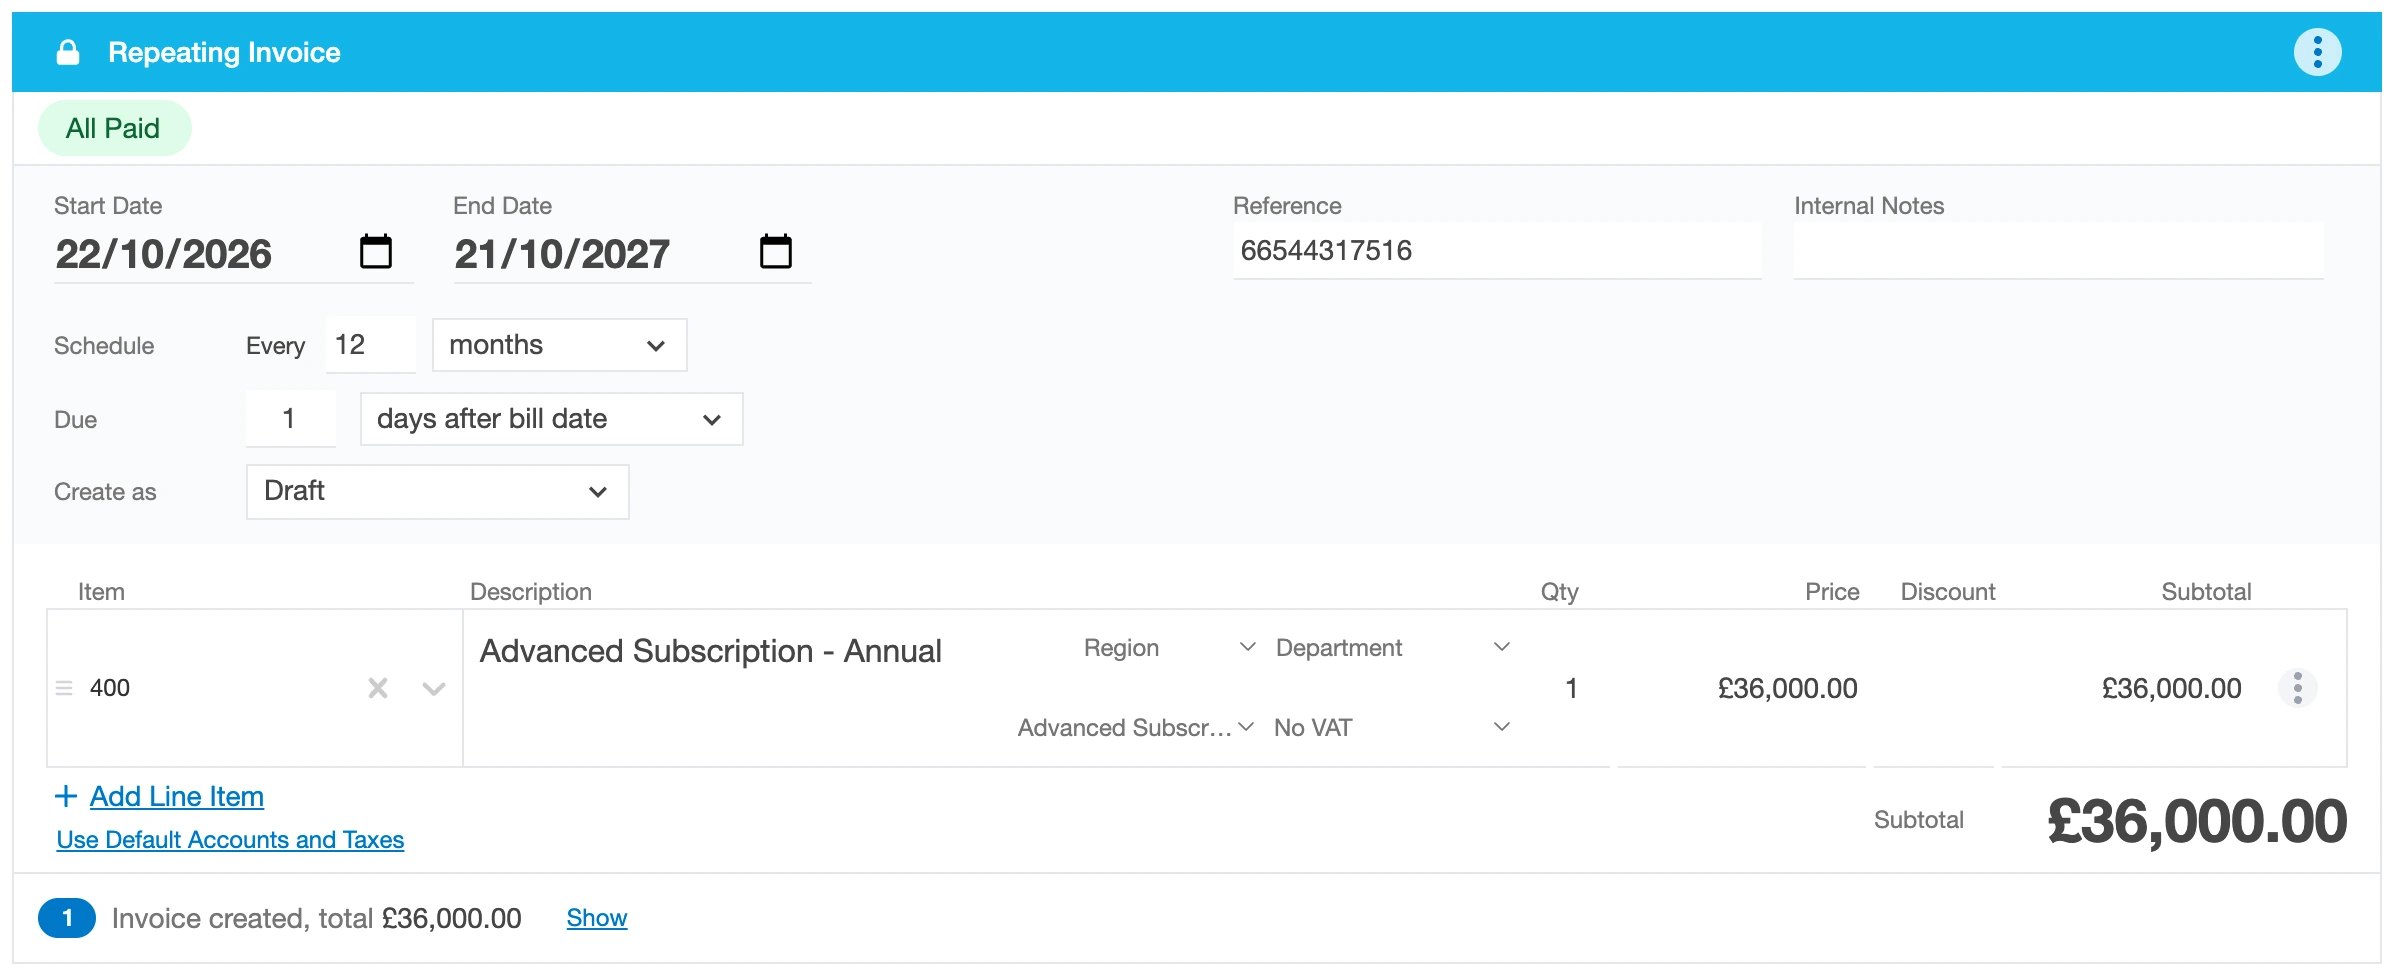
If you can't see the Item column, turn on products in the ScaleXP Invoicing preferences. You need at least one product in your accounting system first.
2. Set up products in Xero
In Xero, products are called items. Go to Business > Products and services and click New item.
- Code (required): a unique code that matches the HubSpot SKU.
- Name (required): shown in ScaleXP Invoicing.
- Sell (required): tick this so the item appears in ScaleXP Invoicing.
- Sales account and Tax rate (recommended): filled in on each invoice line automatically.
- Track inventory (optional): reduces stock when invoices sync. It doesn't stop overselling.
Archived Xero items still appear in ScaleXP Invoicing. Delete them in Xero if you want them removed.
3. Set up products in QuickBooks Online
Go to Sales > Products and services and create or edit a product. ScaleXP Invoicing supports Service, Inventory and Non-inventory products. Bundles aren't supported.
- SKU (required): a unique code that matches the HubSpot SKU.
- Name and Item type (required).
- I sell this product (required): tick this so the product appears in ScaleXP Invoicing.
- Income account and Sales tax (recommended): filled in automatically, and you can change them on the invoice.
- Class and Category (optional): for QuickBooks reporting.
New products show in ScaleXP Invoicing straight away.
4. Add matching SKUs in HubSpot
- In HubSpot, go to Commerce > Products.
- Open each product and set its SKU to the same code as in Xero or QuickBooks.
- Add line items to deals or quotes from this product library, so the SKU carries over to the deal.
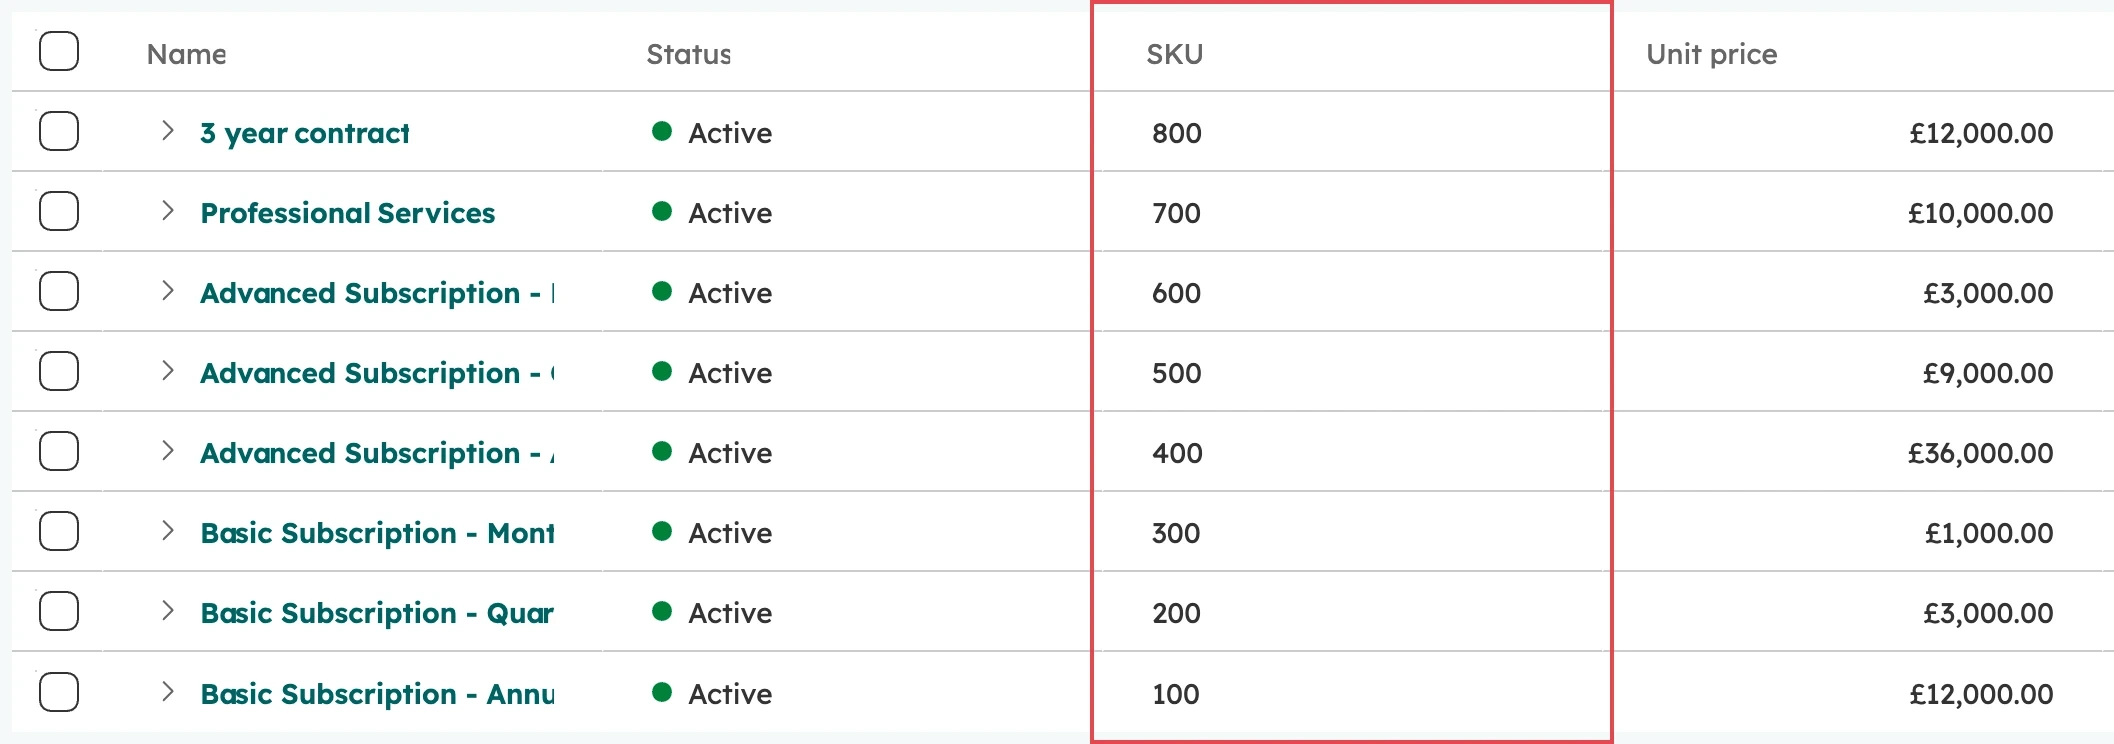
The HubSpot description shows on quotes. The invoice uses the line item description from HubSpot.
5. Keep your products in sync
Set up products in your accounting system first, as it holds the account and tax details. Then copy them to HubSpot:
- Products rarely change: export them from Xero or QuickBooks as a CSV and import them into HubSpot under Commerce > Products. Map the Xero Code or QuickBooks SKU to the HubSpot SKU.
- Products change often: use HubSpot's free Xero or QuickBooks data sync app to keep products in sync. See ScaleXP Invoicing: Using HubSpot's Xero Data Sync app for contacts and products.
If you create products in HubSpot first, export them and import them into Xero or QuickBooks, then add the sales account and tax rate there.